
How to create tile-perfect diagonal lines in Illustrator
Creating diagonal lines in Adobe Illustrator is somewhat of a pain. I’m creating the graphics for our new Web 2.0 site, and had a hard time creating diagonal lines. But here I’ll show you how to create angled 45deg Web 2.0 lines in Illustrator with relative ease.
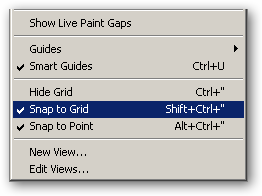
First, turn snap to grid on.
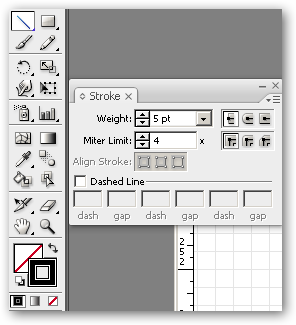
Select the line tool, set the stroke width to 5pt (or your desired width).
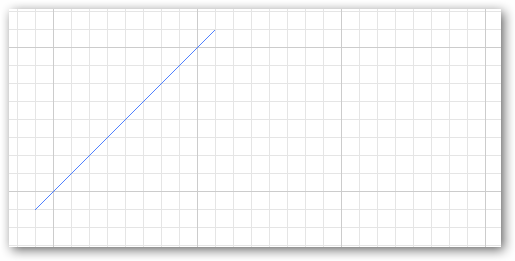
Make sure your stroke color is the color you want it. In this example, my stroke color is black. Next, on the canvas, draw a diagonal line that is slightly larger than the major grid box.
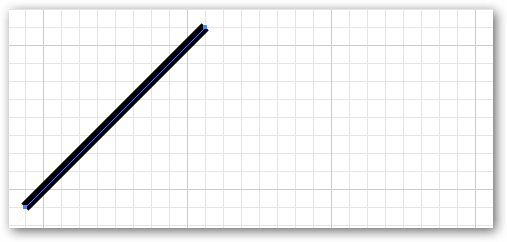
Next, Move-Copy the line 12px away from the first line.
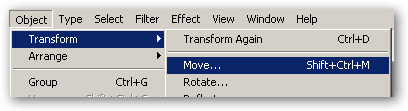

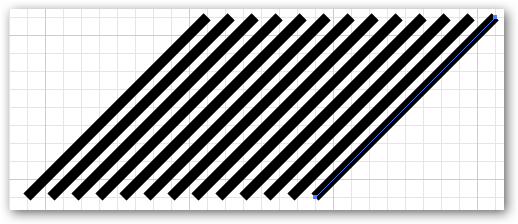
Hit the copy button. Once your copy appears on the canvas, press CTRL-D to repeat. You need to repeat until you have a major grid completely covered. Like so:
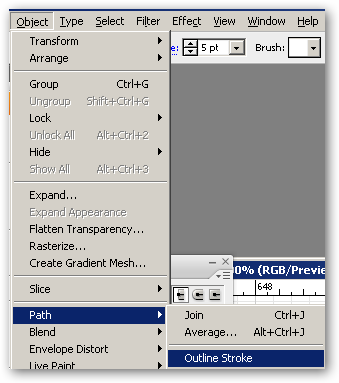
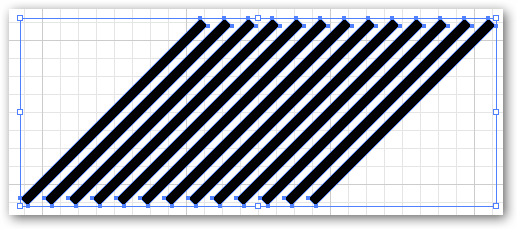
Next, select all the diagonals then go to Object>Path>Outline Stroke as shown below:

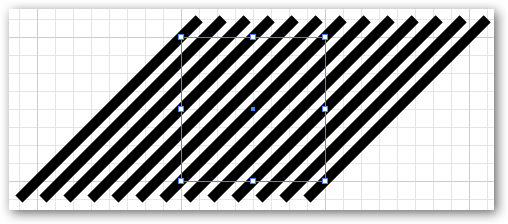
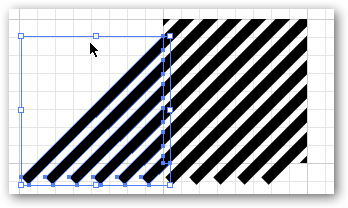
Next, draw a square (with no fill and no stroke) as the same size of a major grid box (72px by 72px) and place it over the covered major grid like this:
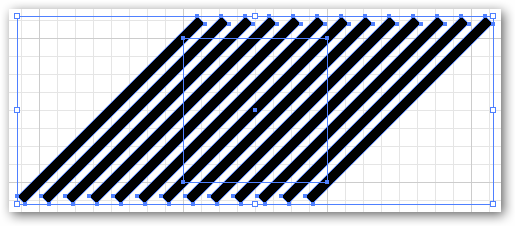
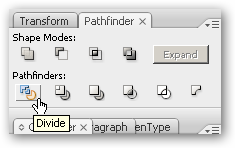
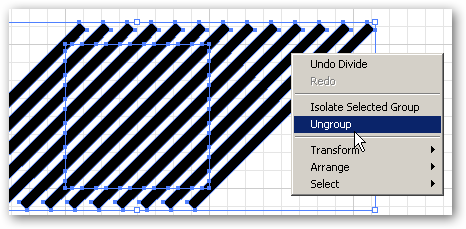
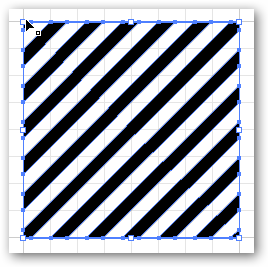
Your square should be 72px width and height. Next, select all, and click Divide on your Path Finder as shown below:
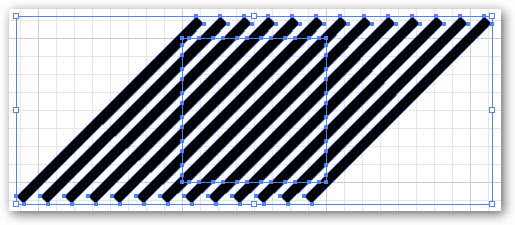
Ungroup and cut the excess diagonals from the major square:
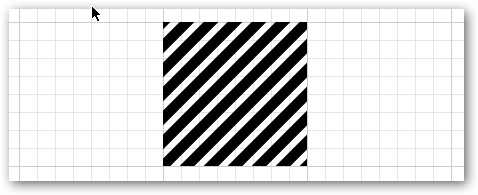
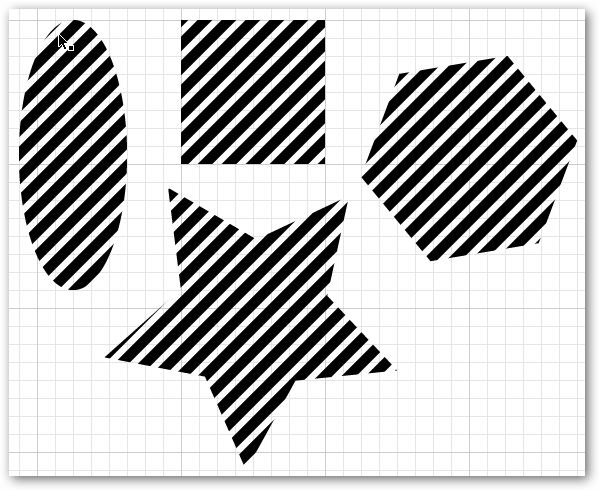
Now you should have a nice cut pattern like the one above. Select your pattern and drag it to your swatches. Once you see your pattern in your swatches palette you can then use the swatch and apply a fill to your irregular pattern and archive the following results:
Pretty cool! :) Hope that helps!
![]()
Helpful Tip:
If you want to apply a radial gradient or a fill color to your stripes, you’ll notice that this method wont work. But to make it work, you just need to continue a little more. Select the original pattern you created:
Next, Merge:
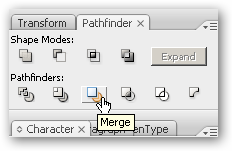
(This effectively merges the original invisible (no stroke no fill) square with your diagonals.)
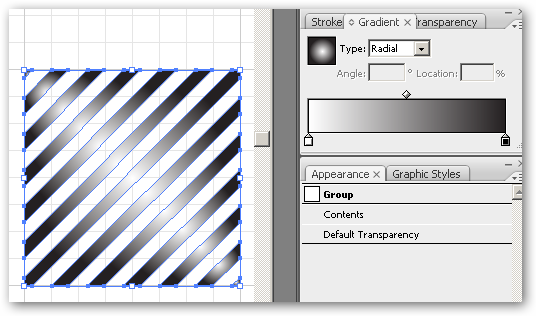
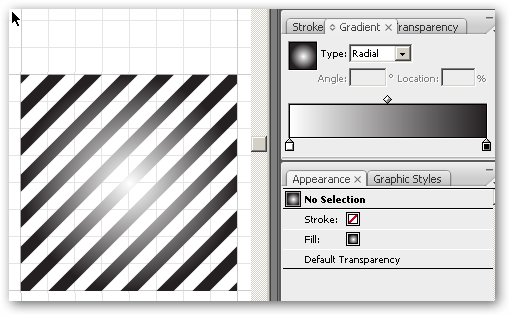
If you choose to stop here, you’ll notice the pattern diagonals still act like individual objects when a fill is applied, and you get something like a diamond shape when applying a radial gradient:
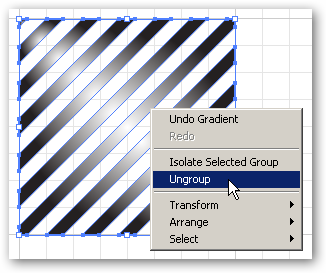
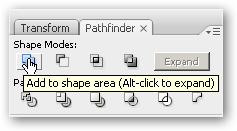
To unify the stripes as a single object do the following (and ultimately, have the gradient applied to the diagonals as a whole, instead of individually), Ungroup:
Then Add Shape Area in your path finder tools:
Then click Expand:
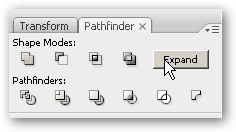
Now you have the gradient applied to the whole shape instead of each individual diagonal line:
There we go! Hope that helps!
Comments
AMANDA
thank you so much!!! this really worked wonders!
Fran
thank you soo much!!
it was quick and easy. thanks for sharing! :)
Matt
nice tutorial, thanks!
The only problem is that the pattern doesn’t align any more if I choose thicker lines or wider spaces than you, does it?
Any idea what to do in that case?
Boboss
Very Thanks ! I needed it
Margaret
I’m going to try this with circles. How do I do this…I have two circles, one with the pattern and one without. I want to overlap the circles, how do you get the effect where just the overlap has the diagonal lines, and 2)in another illustration the area that is not overlapped just shows the lines?
AZN
Thanks mate, helped a lot!
ben
Hey! this is great, thanks!
Can It be done using type? so you fill the font shapes with lines instead of the box?
Aritz
Nice Article… Copy paste from shutterstock! But nice anyway
Brian Chavez
@Aritz Actually, no, this was not a copy paste from shutterstock. I wrote it myself. If anything, shutterstock copy/pasted from me, my publication date is October 21st, 2007. Shutterstock was 2010. Do your research before accusing someone of plagiarism. Thanks.
kirkhere
The pattern doesn’t align any more if I choose thicker lines or wider spaces than you used…
So how do I make any patterns other than exact copies of this?
Lisa
For kirkhere if he happens to come back to check: It’s not too hard to realize that in order to do this you need to think mathematically. Notice that your box is 72px X 72px. The thickness of the line isn’t so important, but your spacing has to be a number that divides evenly into 72.
For Aritz: it might surprise you to know that ideas are free to every mind that bothers to think. You could have figured this out yourself had you bothered to do the work. You didn’t and Brian was nice enough to share.
Thanks to Brian for cutting down on the work we artists have to do by posting this excellent and useful idea. It saved me a lot of time.
Mridul
Very well explained, and incredibly helpful. Many Thanks!
B2
Brian: Huge thanks for these clear instructions!! I had been searching all over and this was just what I needed.
Leave a comment
Your email address will not be published. Required fields are marked *